When the grilling season is over and it’s time to put your pellet grill away for the winter or if you just want to clean up your grill so it’s pristine for the next grilling season, you’ll need to clean it. By taking proper care of your grill, cleaning after every use, removing grease and debris from the drip pan under the cooking area, replacing parts when necessary, and performing periodic maintenance checks will prolong the life of your grill.
Several steps How to Clean a Pellet Grill
Cleaning the Outside of Your Pellet Grill
1. Detach the cooking grate and remove all food particles, seasonings, grease, and sauces that have built up over time. When grilling foods high in sugar or carbohydrates, it is necessary to make sure your grill is completely cooled down before you start this process.
2. Get rid of dust by using a clean, dry microfiber cloth. You can also use compressed air or a small blower to remove any dust that has settled in the grill.
3. Use your grill brush to clean off loose debris on the outside of your grill.
4. After cleaning, give your appliance a good spray with nonstick cooking spray.
5. Let your grill sit for a few minutes, then wipe it down again with a clean cloth to remove any excess cooking spray. Cleaning the Inside of Your Pellet Grill
Cleaning Your Pellet Grill’s Interior
1. Using a long-handled brush, sweep out the main chamber and cooking area of your grill to remove all loose particles from the bottom of the unit.
2. Remove the drip pan from underneath the cooking grate by detaching it from its position under your grill.
3. Clean all areas of your drip pan with warm, soapy water and scrub the drip pan to remove burnt-on food particles.
4. If you find that some areas of your drip pan are stuck-on debris, place it in a bathtub and let it soak in hot, soapy water for 30 minutes before scrubbing again. For stubborn debris, use a stiff brush, fine steel wool, or a scraper.
5. Reassemble your clean drip pan under the cooking area of your grill and replace the cooking grate. If you have a gas grill with an electric ignitor, you’ll need to light a burner for a few moments to burn off any water that may have remained in the drip pan.
6. Using a long-handled brush, sweep out the ash from your unit’s fire pot and dump it in an approved container outdoors to avoid any possibility of a wildfire starting.
7. Inspect all burners for damage by lightly tapping them with a knuckle or screwdriver handle. Replace any damaged burners.
Cleaning Your Pellet Grill’s Exterior
1. Using a clean, dry microfiber cloth, wipe down your grill to get rid of excess dust and debris. Pay special attention to the surfaces of the cooking grates and any other areas that food might stick or accumulate buildup. You can also use a small blower to remove stubborn dust.
2. Remove your cooking grates and inspect them for damage or heavy buildup of grease, food, and debris from the previous grilling season. If you notice significant build up, place the grill grate(s) in a metal trash can and spray with nonstick cooking spray before lighting one or more burners on your grill for several minutes.
3. Remove the cooking grates and place all major components of your grill’s interior (exhaust vent, fire pot, drip pan) in a bathtub with warm water and dish soap to soak for 30 minutes. Remove each part as it softens and scrub thoroughly to remove food particles or debris.
4. Use a long-handled brush to clean the insides of the grill’s fire pot and cooking chamber, as well as all surfaces of your burners by sweeping out loose particles. Don’t forget to remove the drip pan from underneath your cooking grates and scrub it with warm, soapy water.
5. Light one or more burners on your grill for several minutes, depending on how much buildup has accumulated, to remove all water from the interior of your appliance.
6. Reassemble your hardware and cooking grates before seasoning or painting them so they can continue their new life in the outdoor kitchen. Give your grill a good spray with nonstick cooking spray, let it sit for 5 minutes, and then wipe it down again with a clean cloth to remove any excess spray.
Cleaning the Burn Pot of Your Grill
1. Remove the burn pot of your grill and dump any loose particles into an approved metal container outdoors to avoid any possibility of a wildfire starting.
2. Using a solvent, such as a barbecue or a stove cleaner or paint thinner on a clean cloth or small brush, scrub the inside of the chamber to remove all dirt, grease, and food particles.
3. Light one or more burners on your grill for several minutes to remove any remaining solvent before using it again.
4. Reassemble the burn pot of your grill and replace the cooking grates before turning on your unit for an initial cleaning with nonstick cooking spray.
5. Replace the burn pot of your grill and light one or more burners for several minutes to burn off any remaining water.
6. If there’s still heavy grease buildup, you may need to repeat this process again before putting food on the grill.
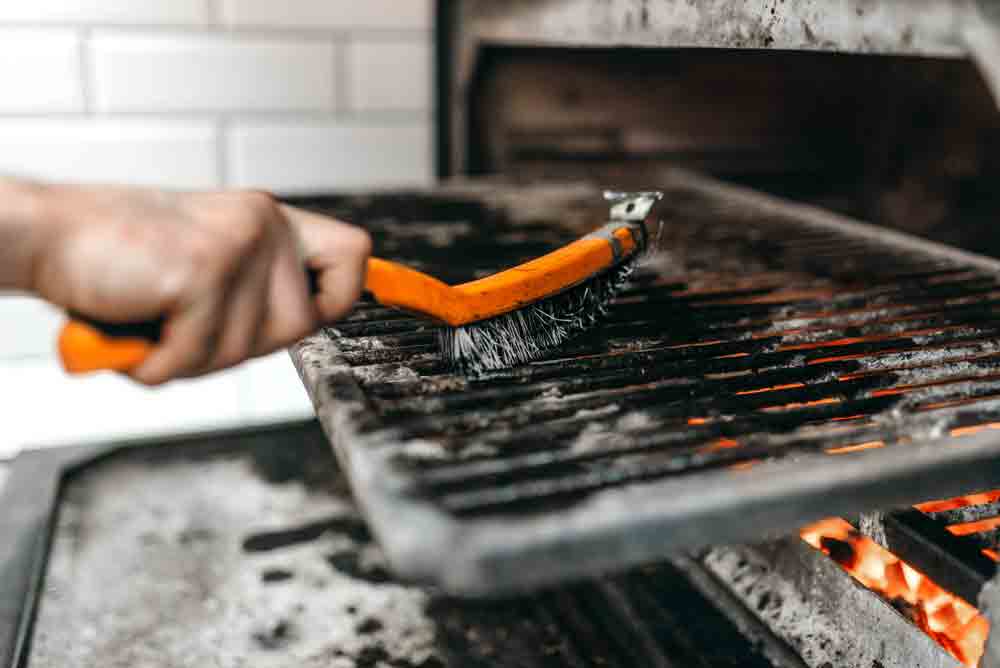
Cleaning Your Grill’s Cooking Grates
1. Remove your cooking grates and, if necessary, place them in a metal container outdoors with enough water to cover the grates.
2. Using a grill brush or fine steel wool, scrub the surface of each grate to remove any caked on food particles. Pay special attention to any areas where grease might accumulate or drip down.
3. If you don’t have a grill brush or steel wool, use a scouring pad or metal pot scrubber and some warm water and soap to work off heavy grease buildup or leftover food particles.
4. Make sure all of your cooking grates are dry before reinstalling them on your pellet grill.
5. Light one or more burners on your grill for several minutes to remove water that remains in the cooking chamber before using it again.
6. Replace the cooking grate(s) and cover the entire surface with a generous layer of nonstick spray before turning it on for an initial cleaning.
7. After using your grill for cooking, you may need to apply another layer of nonstick spray before covering the entire surface again.
Conclusion:
Always be sure to clean your grill’s interior and exterior at the end of each grilling session. In addition, replace the burn pot and drip pan whenever they begin to show signs of wear. Season or paint all major components after cleaning them with nonstick cooking spray before storing your grill for the winter months.